How to build an email marketing that suits the right content for your customer
Published in september, 26 of 2014
Learn with us how to make the most with our platform and see how you can build an email marketing campaign tailoring the content according to your client, without integrations or any kind of programming.
A common purpose among all email marketing strategies: sending the most relevant content to attend the right clients and their real needs, and further, at the most propitious moment. In other words, its a combination between three elements (content, customer and time). Whenever we want to reach this trio we need knowledge we still dont have, we need tools we dont master yet and we dont dispose time do dedicate ourselves the way wed like to.
However, there is something most people dont know, the fact is there is a way to achieve this combination without the need for integrations or programming. All you need is applying emailmanagers features. And here we go to explain how you can make it in a simple step by step.
1º Step: Add Custom Fields to keep your contact base up to date
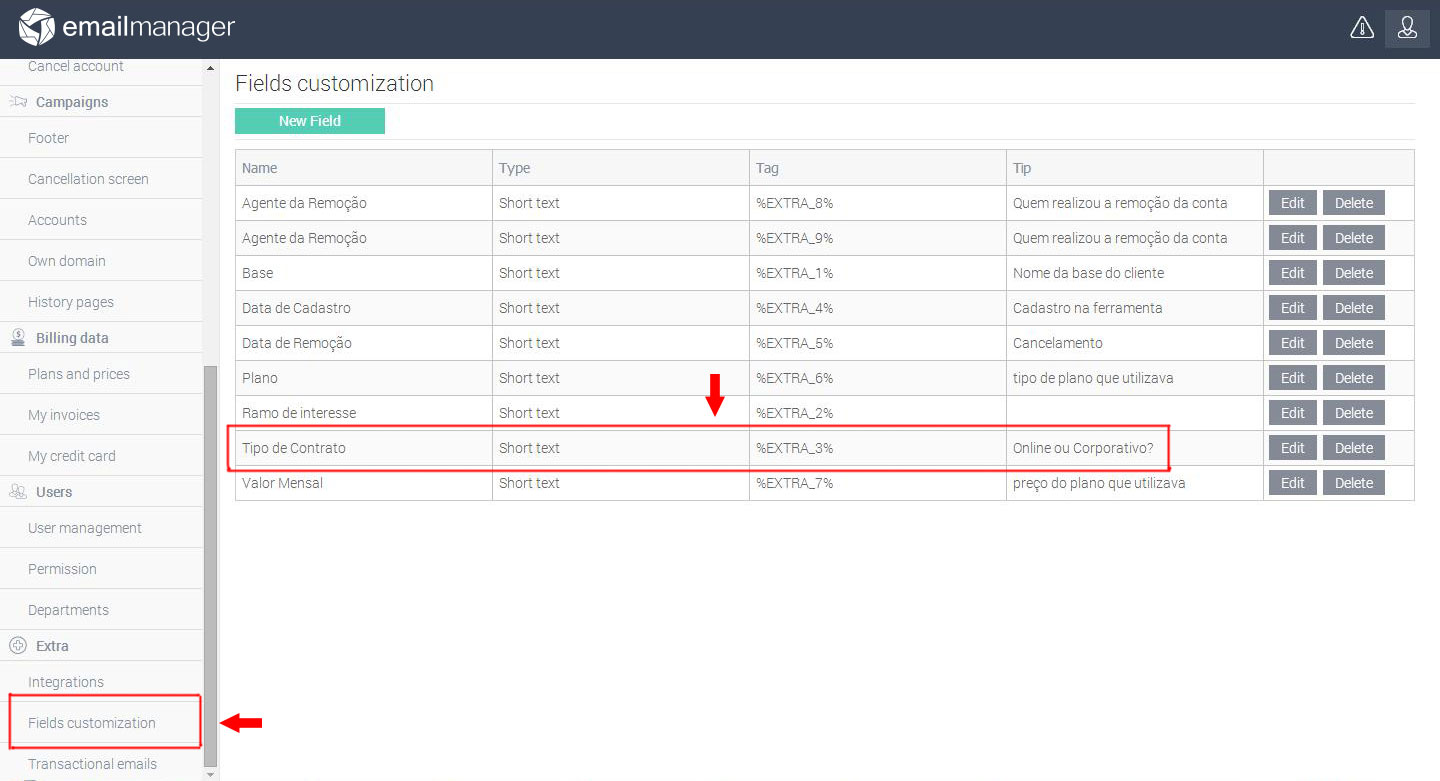
You must already have heard about Custom Fields, right? The emailmanager presents a plenty of rooms automatically filled as default. This way, you are free to add your contact information (name, email, company, births date, and another important data). However, if your contact base has information that is not covered by the system, like last purchase, color hair or travel data, for example, you have an option to create custom fields and add these extra options. On Dashboard, go to Configurations and in the tab Extra, click in Fields Customization.
2º Step: Upload the relevant information
Keep the most relevant data arranged according to a determined standard. For example, categorize your clientele with nomenclatures like Gold Customer, Silver Customer and Customer Bronze; or set offers like Product 1, 2, 3 or 4. Its important to highlight its not about a platforms limitation, but a way to simplify the process that comes later. With custom fields and complete information in your list, its time to create content.
3º Step: Prepare custom content
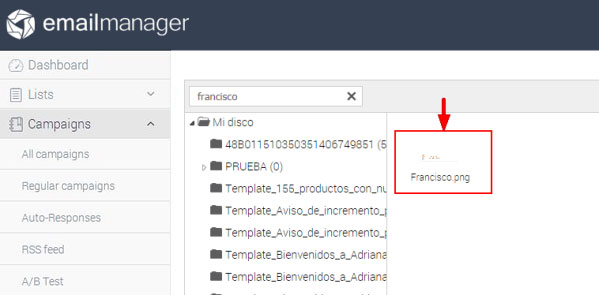
Lets use a Welcome email to our customers as an example, but the emails signature must change according to the trade representative that answered them. If it was a regular process you would have to create a campaign for each seller. Do the upload for each representatives signature as it was for an image. Save it on Virtual Disc.
Tip: its really important that each pic follows the standard adopted for contacts, in other words, it must keep up with the information placed in the system. For example, if your list displays like this:
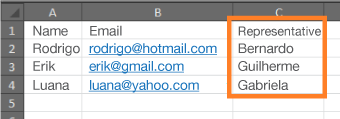
The image should receive the following name:
4º Step: Also customize the campaign
All email content can be customized many times as you wish, with no limit, while its inside the system platform. A classic example for that its a salute followed by the recipients name in the message. However, what many are unaware is this is only one field, among others. Everything can be personalized, including the link that shows the picture with the trade representative signature. Lets look at HTML code, so you can understand better:
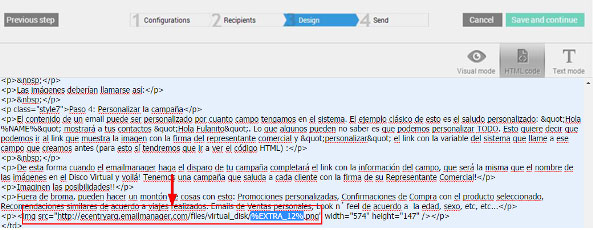
So, when you send your email marketing campaign through emailmanager all information gathered will be compatible with the images names you saved on Virtual Disc. Besides that, youll send a single campaign to greet each customer with his respective trade representative.
Have you ever thought about the possibilities? Custom promotions, purchase confirmations, similar recommendations according to travel data, personal sales emails, among other infinite possibilities.
Did you like the content? Share it!
We are at social networks, so go there and tell us what you think about the tips we posted to you!
Facebook, Twitter, LinkedIn, Google+
Do you have any questions about the platform or suggestions for our blog? Send it to us through the comments!